Alright, so I finally took the plunge and decided to get one of those home sauna kits. Been on my mind for ages, you know? The delivery day was something else – big, heavy boxes dropped off, and it felt a bit like Christmas morning, except I knew there was some proper work involved this time around. First things first, I had to clear out a good spot in my basement. You always think you have enough space, but trust me, you always need more once you start unpacking everything. I made sure I had room to actually move around the thing as I built it.
Then came the unboxing. Laid all the wooden panels and bits and pieces out on the floor. Looked like a giant, flat-pack puzzle, if I’m honest. I rounded up my tools: my trusty drill, a good level – absolutely essential, that one – a rubber mallet, and a screwdriver set. Figured that would cover most of it. It’s always better to have them ready than to be scrambling mid-job.
Putting the Bones Together
Okay, so the base panel, the floor of the sauna, that was pretty straightforward. Just kinda… plopped it where it needed to go. Checked it with the level, good to go. Then came the walls. Most of these kits have panels that slot into each other, sort of like tongue-and-groove, you know? I started with one of the back corner panels and just worked my way around. This part needed a bit of patience. Some panels slid in easy, others needed a bit of persuasion with the rubber mallet. Just gentle taps, mind you, don’t want to go smashing things up. It was actually quite satisfying, seeing the walls go up one by one, taking shape. You really have to make sure each panel is snug and tight against the next one. No gaps! That’s key for keeping the heat in later.
Next up was the ceiling panel. This was a bit awkward, trying to lift it and slot it on top of the walls. If you’ve got a mate to help, definitely use them for this bit. I managed it solo, but it took some careful maneuvering. Once it was on, I spent a good while making sure everything was square and secure. There were usually screws or clips to lock the walls to the base and the ceiling to the walls. Double-checked everything. You want this thing to be solid.

Getting the Inside Sorted
With the main box built, it was time for the guts of the sauna. The benches were next. These usually come as pre-assembled sections or easy-to-assemble parts. Mine just slotted onto some supports that were part of the wall panels. Made sure they were sturdy – no one wants a wobbly bench when they’re trying to relax!
Then, the main event: the heater. This felt like the most crucial part. I positioned it according to the instructions – they’re pretty specific about clearances for safety. Mine was an electric one.
- I had an electrician mate come over to do the main wiring to the power supply because, honestly, I don’t mess with high-voltage stuff. Better safe than sorry.
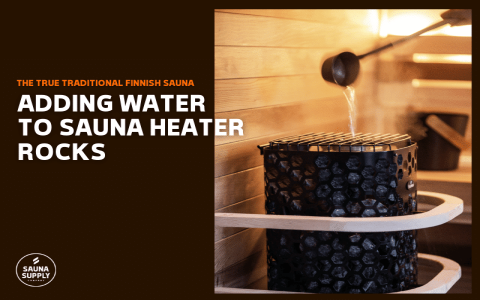
- Once that was sorted, I just had to mount the heater unit to the wall and then carefully place all those sauna stones around and on top of the heating elements. There’s an art to that, apparently, to get good airflow.
The Final Bits and Bobs
The door was next. Hung it on its hinges, which wasn’t too bad. Attached the wooden handle. It’s amazing how adding a door suddenly makes it feel like a proper room. Then I fixed the interior light – nothing fancy, just a simple, heat-resistant fitting. Put up the thermometer and hygrometer too, because you need to know what’s going on in there. Oh, and the little wooden bucket and ladle – can’t have a sauna without those!
I also made sure any internal trim pieces were fitted, just to give it a nice, finished look. Stepped back and had a good look. Not bad, if I do say so myself! Took a good few hours, spread over a weekend, but seeing it all done was a great feeling.

Firing It Up!
After a final check of everything, making sure all screws were tight and wires were tidy, it was time for the first test run. Switched it on and waited. It took a little while to heat up the first time, which is normal. The smell of the fresh cedarwood filling the air was just fantastic. Stepped inside, closed the door, and wow. All that effort, totally worth it. Building it myself, piece by piece, made that first sauna session even better. You learn a lot doing these things yourself, that’s for sure. And now, I’ve got my own little slice of warmth whenever I need it. Perfect.
