Alright, so folks have been asking how I got this sauna built in my backyard. It wasn’t exactly a walk in the park, let me tell ya, but totally doable if you’re a bit handy and don’t mind getting your hands dirty. I figured I’d jot down how I went about it, kind of like a diary of the whole shebang.
Getting Started – The Dream and The Dirt
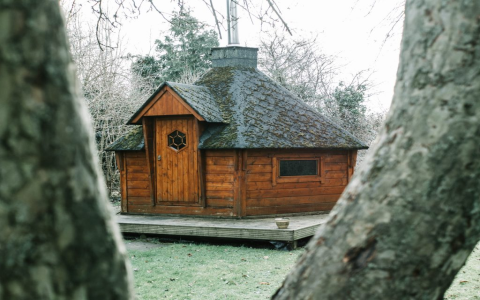
First off, the idea. My old bones were aching, and the wife kept seeing these fancy sauna things on those home improvement shows. So, one weekend, after too much coffee, I said, “Alright, let’s do it!” The first thing I did was grab a shovel. Not for building, mind you, but for clearing out that old junk pile where the sauna was gonna go. That took a solid day, I swear.
Then, I spent hours, and I mean HOURS, looking at pictures online. Some plans wanted you to be a rocket scientist. I just wanted a hot box to sweat in, you know? I eventually found some basic layouts, nothing too fancy, and kinda mashed them together into what I thought would work for the space I had.
Laying the Groundwork – Literally
Okay, foundation time. I didn’t want this thing sinking into the mud. I decided on a simple concrete paver base.
- Cleared and leveled the ground. This part SUCKED. My back was screaming.
- Put down a layer of gravel, tamped it down real good.
- Laid out the pavers. Getting them level was a pain, but I got there with a rubber mallet and a lot of squinting.
My neighbor, old Tom, came over and just watched, shaking his head. He said I should’ve poured a slab. Maybe he was right, but this was cheaper and faster for me.
Framing It Up – Taking Shape
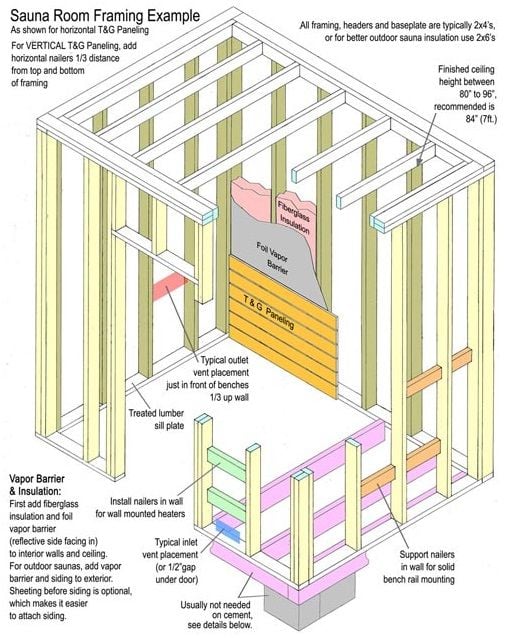
This was the fun part, where it started to look like something. I bought a load of 2x4s. Tip: check every single one for warping before you leave the store. I learned that the hard way on a previous shed project.
- I cut all the pieces for the walls first. Measure twice, cut once, right? Yeah, I still messed up a couple.
- Then I started assembling the wall frames on the ground. Nailing them together, making sure they were square. My kid helped hold things, mostly just got in the way, but it was good bonding, I guess.
- Hoisting those walls up and screwing them to the paver base and to each other, that was a moment. It finally felt real!
I made sure to frame out a spot for the door and a small window. And of course, the space for the heater wires to eventually come through.

Insulation and Wiring – The Guts
Now, this is important. You want that heat to stay IN. I went with rockwool insulation. It’s a bit itchy to work with, so wear long sleeves and gloves, trust me. I stuffed it into every cavity in the walls and ceiling. My wife said it looked like a giant fluffy monster ate our shed frame.
For wiring, I’m not an idiot, so I got my electrician buddy, Dave, to run the dedicated line for the heater. He knows his stuff. I just helped pull wires and handed him tools. Don’t mess with electricity if you don’t know what you’re doing. Seriously.
After the insulation, I stapled up a vapor barrier. That shiny foil stuff. This keeps moisture from getting into your insulation and walls. You have to tape all the seams properly. I probably used a whole roll of that special foil tape.
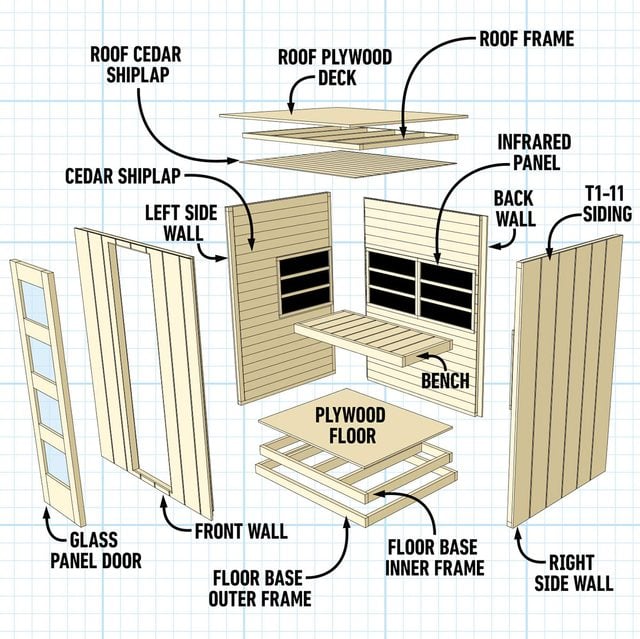
Interior Paneling – Making it Pretty (and Smelly, in a good way)
Cedar. It had to be cedar. The smell, you know? It’s pricey, though. My wallet cried a little when I bought those tongue-and-groove cedar planks.
- I started from the bottom and worked my way up, nailing the planks to the studs. A brad nailer is your best friend here.
- Leaving a small gap at the bottom for air circulation, that’s a pro tip I actually listened to.
- The ceiling was tricky. Working overhead, planks kept wanting to fall on my head. Good times.
Man, when that cedar went in, the whole thing started smelling amazing. Even before the heater was in!
Benches, Door, and Heater – The Final Touches
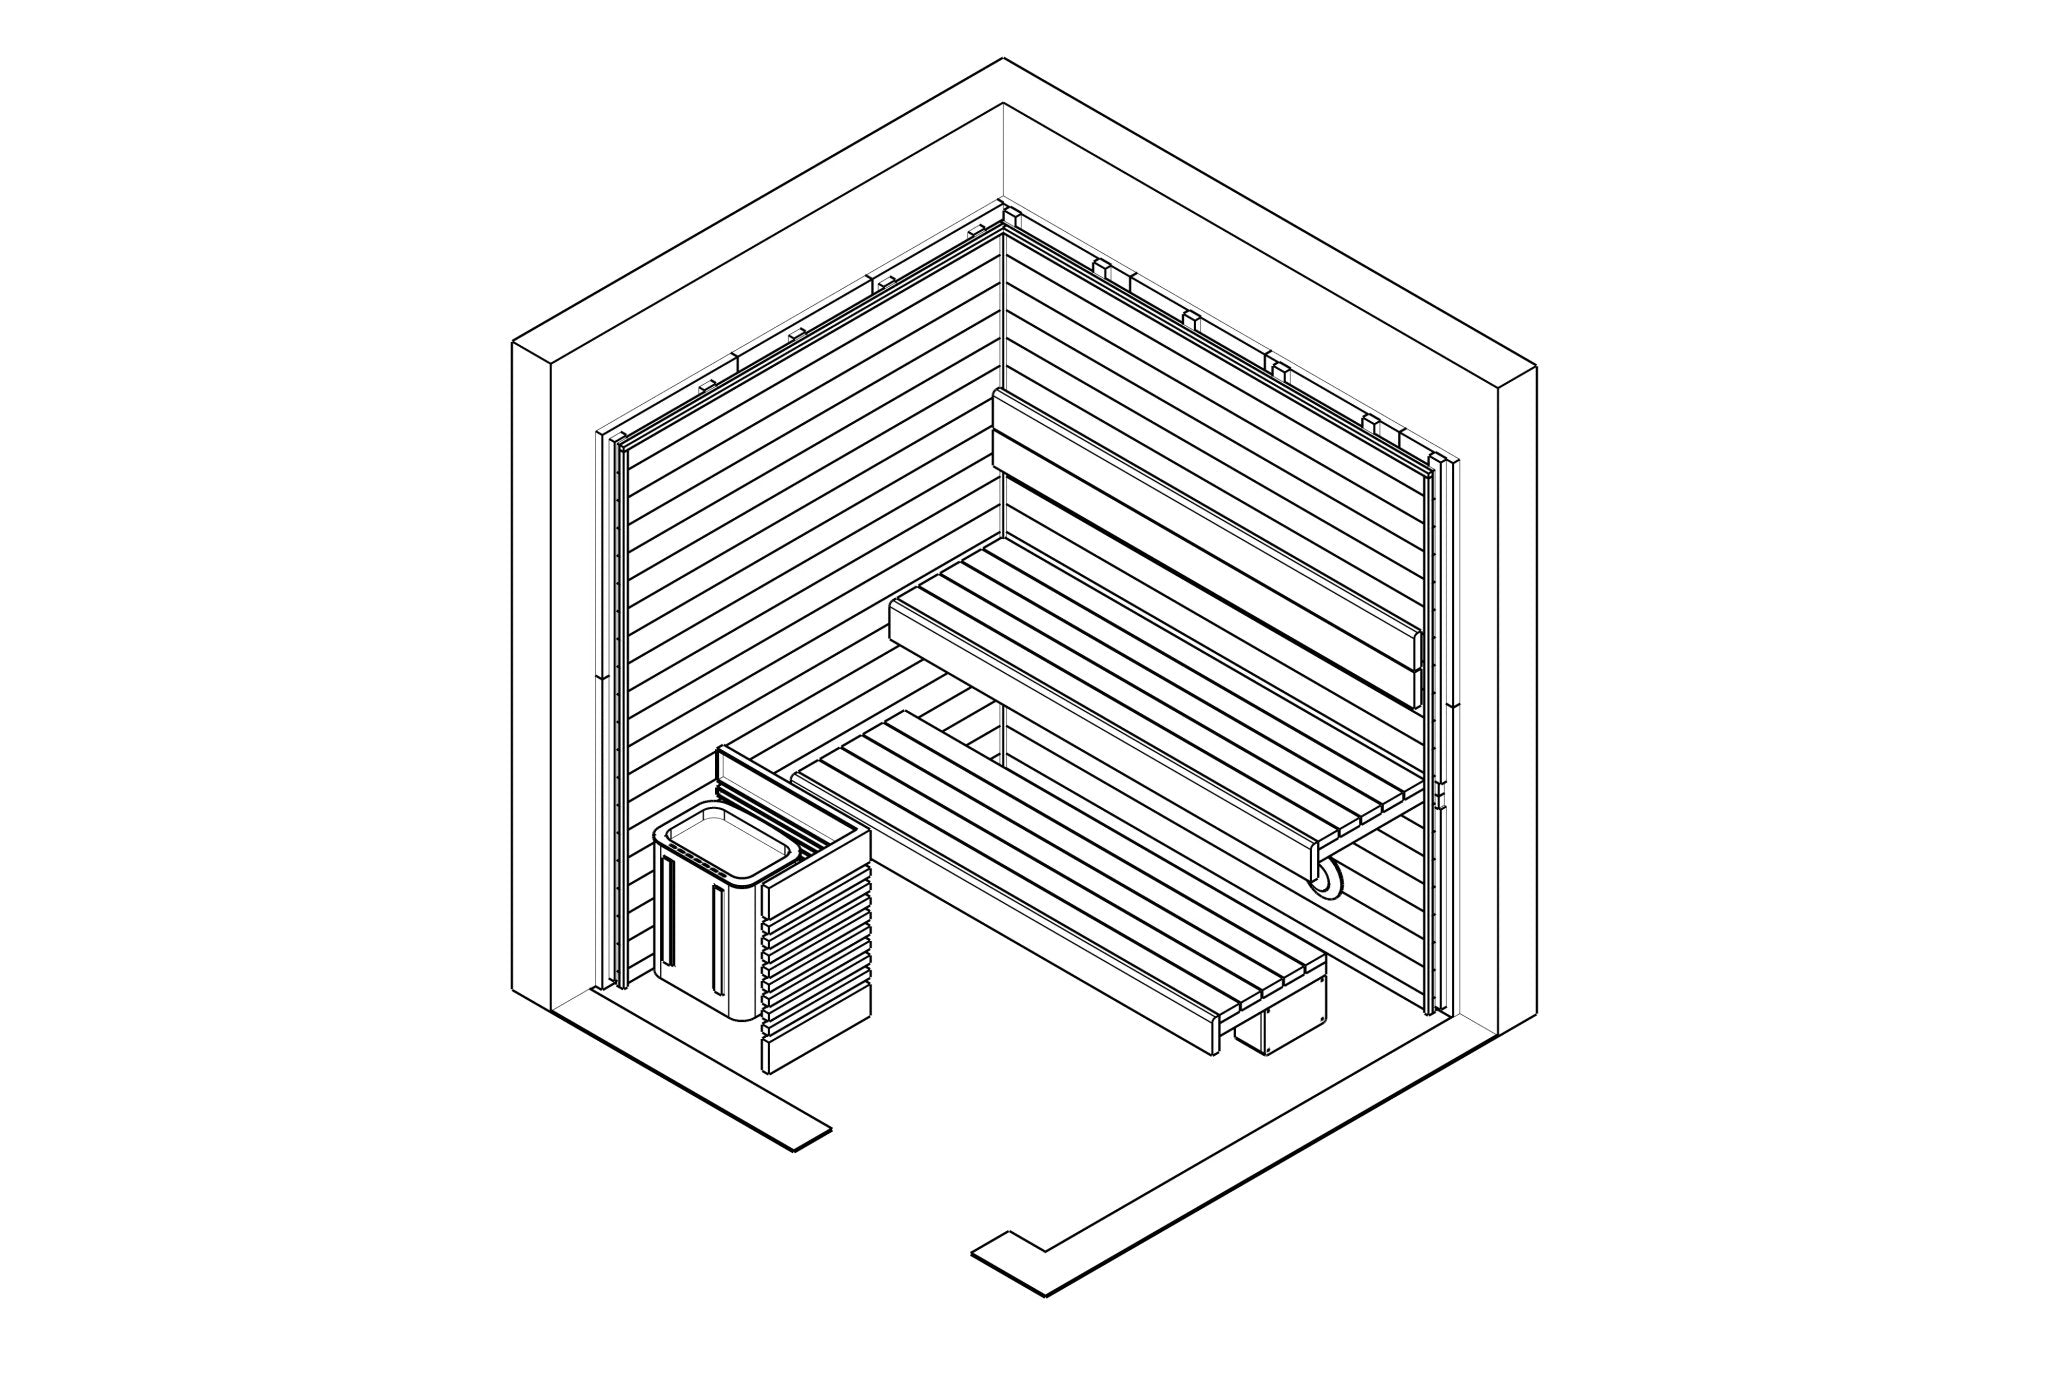
For the benches, I used more cedar, thicker stuff this time, 2x4s and 2x2s. I built two levels. Simple, sturdy. Sanded them smooth, didn’t want any splinters in uncomfortable places.
The door, I bought a pre-hung exterior door with a window. Made sure it opened outwards, that’s a safety thing for saunas. Fitted that into the frame I’d made. A few shims here and there, and it was swinging pretty.
Then, the heater. I chose an electric one with rocks. Following the instructions to the letter, I mounted it to the wall, making sure it had the right clearances. Dave the electrician came back to do the final hookup. He checked everything twice. Smart man.
Piled the sauna stones on top. That felt like a ritual.
The First Sweat – Victory!
I let the whole thing air out for a day, then it was time. I flipped the switch, waited for it to heat up. The anticipation was killing me. Stepping in there for the first time, feeling that wave of heat, the smell of cedar… man. It was all worth it. All the sore muscles, the splinters, the trips to the hardware store.
So yeah, that’s how I did it. It’s not perfect, there are a few spots where the planks aren’t perfectly aligned if you look real close, but it’s mine. And it works like a charm. If I can do it, you probably can too. Just take your time, don’t cut corners on safety, and be prepared to sweat a bit even before you turn the heater on!